

A simple 5 minute edit can completely change an image for the better. This Lightroom edit tutorial will quickly show you how it’s done so that you can go out and do it for yourself!
Accessing industry standard photography tools is easier than ever with Adobe Creative Cloud subscriptions. Students can benefit from a huge discount, getting all Creative Cloud applications for just £16.24 per month. This gives you access to Photoshop, Lightroom, InDesign, Premiere Pro, and more. Alternatively, for just £9.98 per month you can use Lightroom with 20gb of cloud storage. It might seem like a lot to spend every month, but it’s as cheap as a Netflix subscription, and the results are well worth the price if you put the effort in. Alternatively, if Lightroom doesn’t tickle your pickle, here is a great article on other photo editing software options.
Step 1 – Check Presets
While it may seem like a bit of a cheat to immediately use presets or LUTS on a photo, there are many advantages to doing this. First of all, by trying different presets on your image, you will get a better idea of what works and what doesn’t, and what you want your final edit to look like. Doing this also saves a lot of time! It’s a good idea to create your own presets for this very reason as it will help you achieve your own style and edit much more quickly.

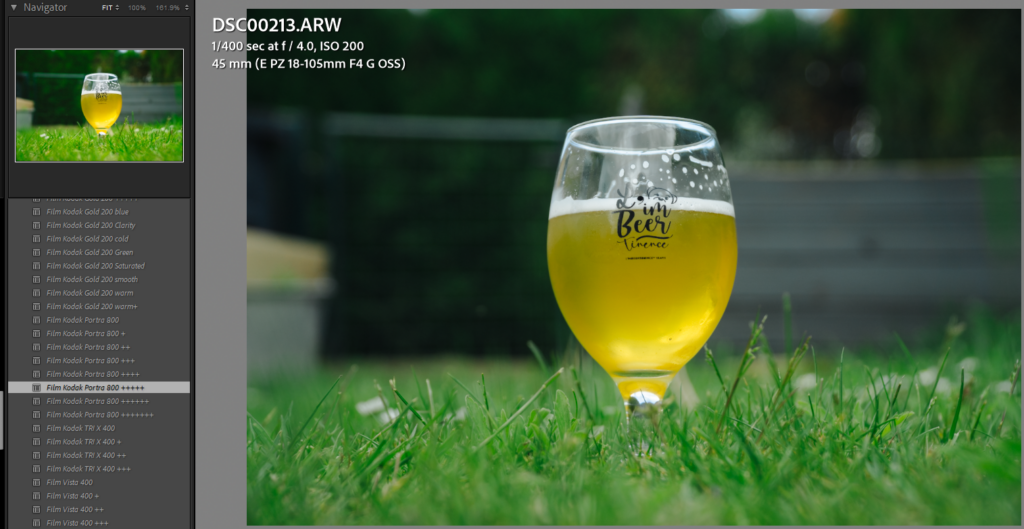
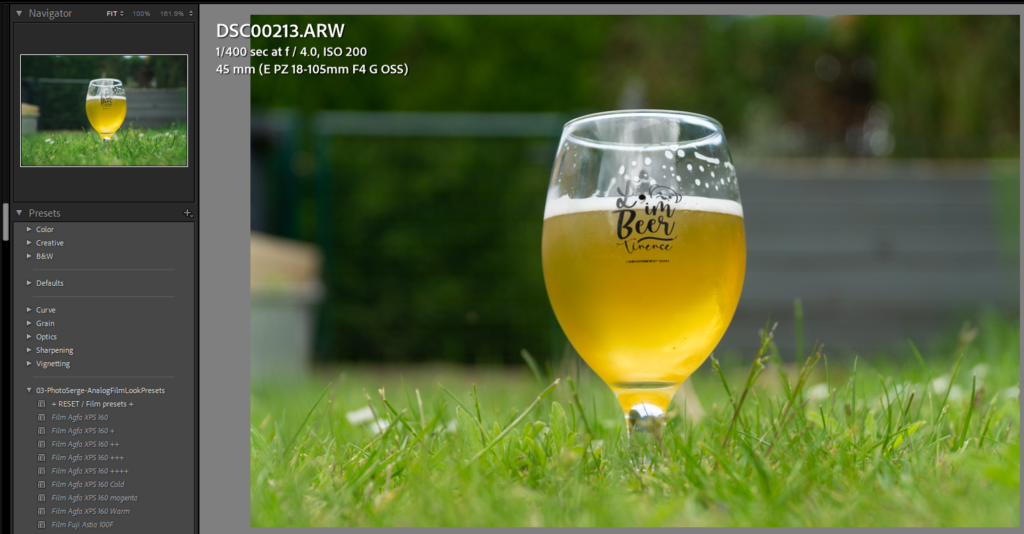
So with this image here, I scan my presets and look at the previews to see what I like. I decide that the Film Kodak Portrait 800 ++++ looks good for this image, giving me a slightly moodier and colder image than before with darker greens and a better focus on the subject.
Step 2 – Exposure and Contrast
The next step is to check that the exposure is at a suitable level for the photo, followed by adjusting the contrast to match how you want your photo to look. These adjusments really depend on the style of photo and mood you want to portray, but a useful tool is the histogram which shows you how the range of tones captured in your photo. The left of the histogram represents the darkest areas and the right hand side shows the lightest areas. Your image will often often be either under or overexposed after adding a preset, so it is important to adjust the exposure accordingly.
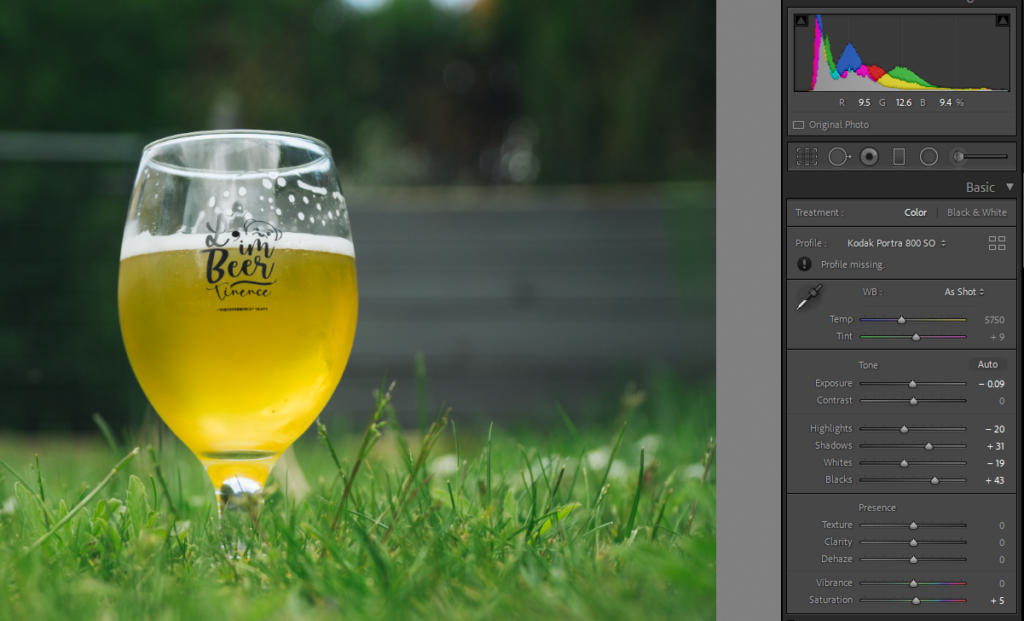
BONUS STEP – Tone Curve
Usually when editing, the tone curve is perhaps the most important component to alter. It changes the brightness and contrast of all tones in the image, but allows you to do edit each one individually rather than all at once. This ultimately gives you greater creative freedom. Because I used a preset in this Lightroom edit tutorial, changes to the tone curve were automatically applied and I was happy with these changes.
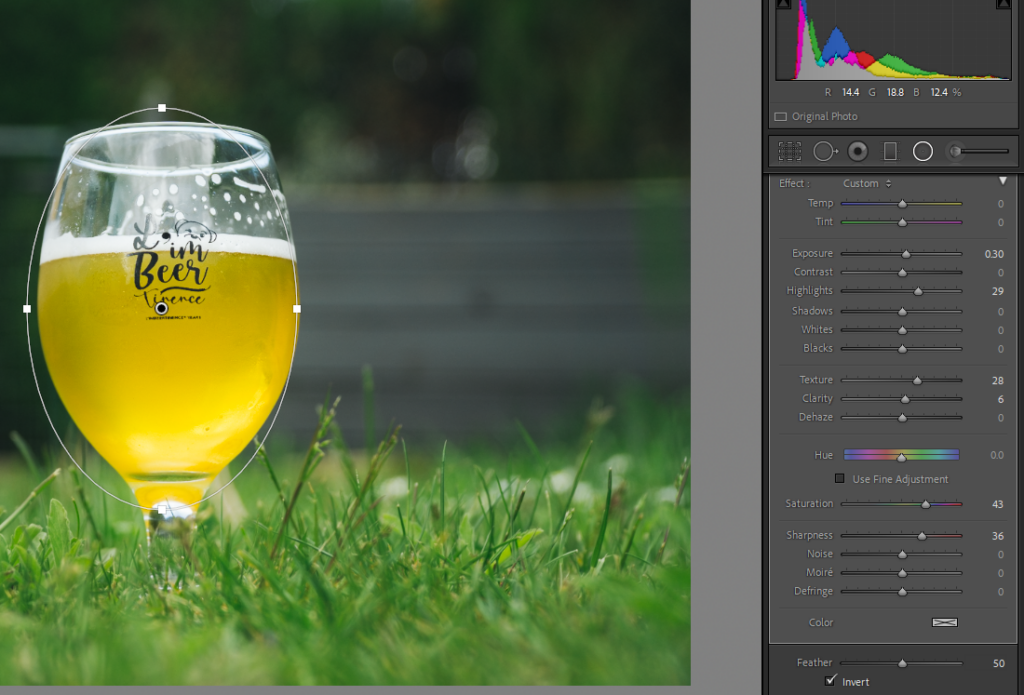
Step 3 – Radial Filter
The radial filter is a great way to make local adjustments, allowing you to bring attention to or away from specific elements in your image. In this photo the subject is obviously the beer glass so I add a radial filter to sharpen this and add texture which makes it stand out more.
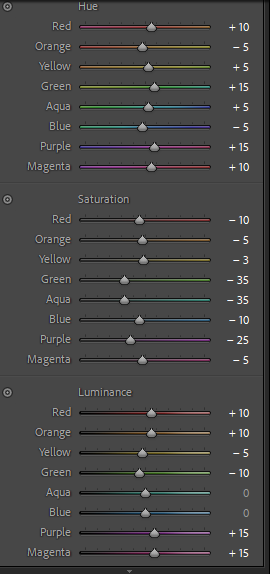
Step 4 – Colours and Split Toning
It’s no surprise that colours are a vital part of any photo as they can drastically change the feeling and meaning behind them. You can easily alter the hue, saturation, and luminance of colours in Lightroom. Hue is essentially the shade of colour, for example you can alter the blues in the ocean to be more turquoise or more marine blue. Saturation is the strength of your colours, and a saturated green in the trees will often look happier and brighter than a lowly-saturated green. Finally, luminance is how bright or dark each colour is.
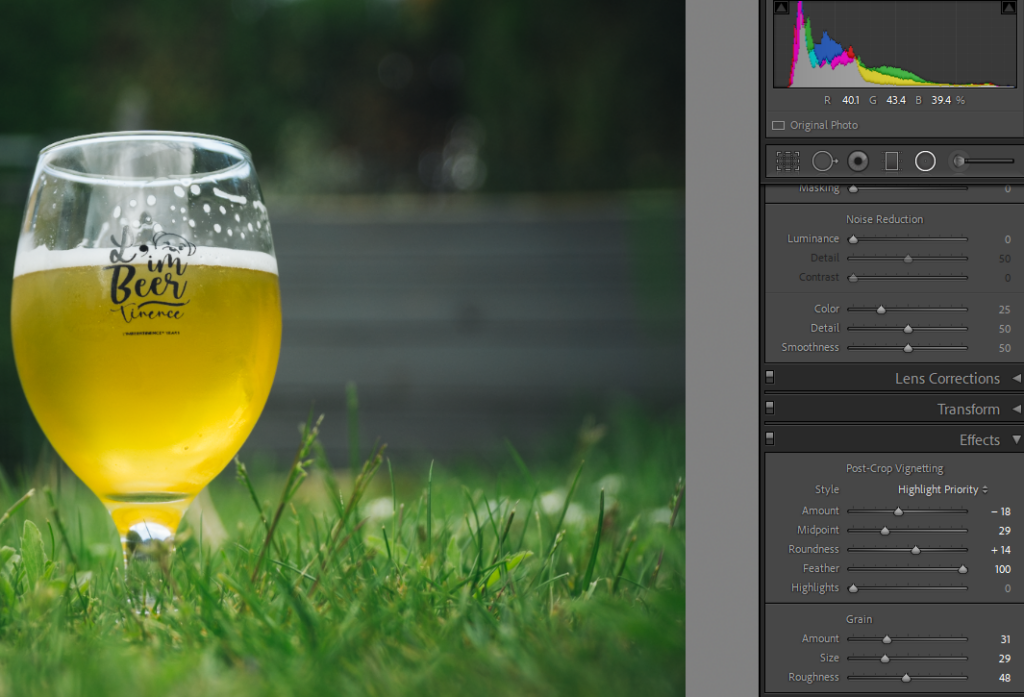
Step 5 – Vignette
Like the radial filter, a vignette is a great way to draw the viewer’s eye to a part of the image. There are multiple ways of adding vignette but the easiest is to use the slider in Lightroom where you can select how much vignette to add, how round it is, and how far towards the centre it goes.
And there you have it! A lightroom edit tutorial in 5 quick and easy steps that will make your photos stand out. Now, time for a refreshment to celebrate!
Follow the Snapshot by CameraVibe Official Instagram here ^
Pingback:4 Great Photography Youtubers You Might Not Have Heard Of - SNAPSHOT